Savor the Moments
Hey Lykkers! Imagine the crunch of a perfectly pickled green olive, bursting with that zesty, tangy flavor. Pretty irresistible, right?
Well, good news! You don't have to head to a specialty store to enjoy this snack. Making your own pickled olives at home is easier than you think—and today, we're going to show you exactly how.
From picking the right olives to preparing them just right, we've got all the tips and tricks to help you create the most delicious pickled olives right in your own kitchen. Ready to dive into the art of pickling? Let's get started!
The Olive Tree: A Gift from Nature
Olives have been part of Mediterranean culture for centuries and are considered symbols of peace and prosperity. The olive tree, known for its deep green leaves and gnarled trunk, thrives in the sunny, dry climate of the Mediterranean. This tree produces fruits — the olives — which come in two main types: those used for making oil and those perfect for pickling.
The beauty of olives is that they are incredibly versatile. You can enjoy them fresh, pressed for oil, or pickled. And today, we're going to focus on the art of pickling green olives — a delicious treat that's easy to make and full of flavor.
Types of Olives You Can Pickle
When it comes to pickling olives, there are a few different varieties to consider:
1. Oil Olives: These olives have thinner skin and are ideal for making olive oil.
2. Pickling Olives: These olives are thicker-skinned with denser flesh, making them perfect for pickling.
3. Wild Olives: A combination of both the oil and pickling varieties, these olives can be used for either purpose.
Now, let's get into the fun part — pickling!
When to Harvest Olives
The best time to harvest green olives is in early autumn, around mid-September. That's when the olives begin to turn yellow, signaling that they're ready for picking. If you're harvesting black olives, you'll want to wait until October or November when they're fully ripe.
Two Simple Ways to Pickle Green Olives
Pickling green olives is an easy way to preserve them while enhancing their flavor. Here are two popular methods to try: Pressed Olives (Rasee'a) and Stuffed Olives with Carrot.
Method 1: Pressed Olives (Rasee'a)
For this method, you'll need:
- 1 kg of medium-sized green olives (local olives are best)
- ½ kg of lemons
- 1 ounce of green hot pepper
Steps:
1. Pick your ripe olives and gently press them with a stone or heavy object to release some of the bitterness.
2. Soak the pressed olives in water for about 15 days, changing the water every 2-3 days.
3. Prepare the brine by mixing:
- 1 liter of water
- 7 tablespoons of salt
- 1 tablespoon of sugar
- 1 tablespoon of white vinegar
4. Place the pressed olives into jars, covering them with the brine.
5. After 15 days, taste the olives. If they're not as tangy as you like, leave them for a few more days.
Method 2: Stuffed Olives with Carrot
This method is a little more fun and adds a burst of flavor! You'll need:
- 1 kg of green olives
- 2 lemons
- Salt to taste
- 2 hot peppers
- A small amount of olive oil
Steps:
1. Wash the olives and carefully remove the pits.
2. Soak the olives in salted water for 5-6 days, changing the water every day to help reduce bitterness.
3. Slice the carrots into thin strips and stuff them into the olives.
4. Place the stuffed olives in jars with hot peppers and lemon slices.
5. Store the jars in a cool, dry place and let them sit for about a week. Taste them after a week, and if they're still bitter, leave them for another 5 days.
Enjoy Your Homemade Pickled Olives!
Once your olives are ready, you'll have a delicious, Mediterranean-inspired snack that's perfect for sharing with friends and family. Whether you prefer the simple pressed olives or the flavorful stuffed ones, homemade pickled olives are sure to become a favorite in your kitchen.
So, are you ready to pick some olives and try these easy recipes? Your taste buds will thank you! Happy pickling, Lykkers!
-
 Free Istanbul? Yes, Really!Palaces, bazaars, and Bosphorus views—all without spending a lira. Can Istanbul really be this generous?
 -
 Tiramisu Ice PopsThese Tiramisu Ice Pops Are The Perfect Dessert For Coffee Lovers – Easy and Delicious!
 -
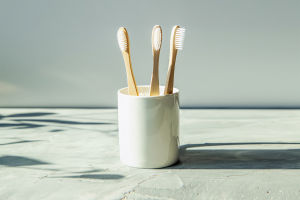 Brush Better NowDiscover the Best Toothbrush for Your Smile: Secrets for Choosing the Perfect One!
Copyright © zogu 2021 - 2025. All Right Reserved.