Mastering White Balance
Color is one of the most important elements in photography. Yet sometimes, your photos turn out too blue, too orange, or just plain unnatural. That’s where white balance comes in. White balance is your camera’s way of correcting color so whites look white and every other color appears accurate.
Different lighting sources—from sunlight to fluorescent bulbs—give off different color temperatures, and your camera needs guidance to adjust. Understanding how white balance works can transform your photography, making your images look more true to life. This guide will walk you through the basics and show you how to use it effectively.
The Basics of White Balance
Before you can control white balance, it helps to understand what it is and how it works.
What Is White Balance?
White balance is a camera setting that adjusts color tones to match the light source. Without it, photos can look too warm (orange-yellow) or too cool (blue). Setting it correctly ensures your image reflects the actual colors of the scene.
Color Temperature Explained
Light is measured in Kelvin. Lower values (around 2000–3500K) appear warm and orange, like candlelight or tungsten bulbs. Higher values (above 5500K) appear cool and blue, like daylight or shade. White balance tells your camera how to interpret these temperatures.
Common Presets
Most cameras come with white balance presets such as daylight, cloudy, shade, tungsten, and fluorescent. Each preset automatically compensates for a specific type of light source. For example, choosing “cloudy” warms up photos taken under gray skies.
Auto White Balance (AWB)
Auto mode often does a good job, especially in balanced light. However, it can struggle in mixed lighting situations. Knowing how to adjust manually gives you more control and consistency.
Practical Tips for Using White Balance
Once you understand the basics, it’s time to apply them in real situations. Here’s how you can make white balance work for you.
Use Presets as a Starting Point
If you’re shooting indoors under tungsten bulbs, switch to the tungsten preset. Outdoors in shade? Try the shade preset. These quick fixes often give you better results than leaving it on auto.
Experiment with Custom Settings
Most cameras allow you to set white balance manually by choosing a Kelvin value. For example, setting it to 5600K mimics daylight. Experiment with different values to see how they affect mood and tone.
Try a Gray Card
For the most accurate results, use a gray card. Place it in your scene, take a reference shot, and set your custom white balance based on that photo. This technique ensures consistent colors across your images.
Embrace Creative Choices
White balance doesn’t always have to be “correct.” You can intentionally make your photo cooler or warmer to create a specific mood. A cooler setting adds drama to a snowy scene, while a warmer setting makes a sunset feel even cozier.
Shoot in RAW for Flexibility
When you shoot in RAW, you can adjust white balance later without losing quality. This gives you the freedom to fine-tune colors during editing if the in-camera setting wasn’t perfect.
White balance is a key tool for making your photos look natural and vibrant. By understanding color temperature and experimenting with presets, custom settings, and tools like gray cards, you can control the look of your images with confidence. Remember, white balance isn’t only about accuracy—it’s also a creative choice that can shape the mood of your photos.
Practice often, and soon adjusting white balance will feel second nature. With this skill, you’ll be able to capture scenes exactly as you see them—or even better, as you want others to feel them.
-
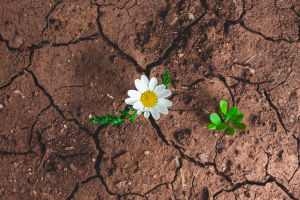 Drought and MetabolismHow water stress reshapes plant metabolism and survival strategies?
 -
 Nano Life ShiftThe Science of Tiny Tech: How Nanotechnology Secretly Transforms Our Homes, Clothes, and Gadgets Every Day!
 -
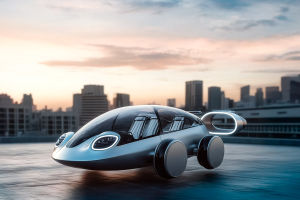 Fly Car FutureHow Far Away Are Flying Cars From Us? The Surprising Truth About Our Skyward Future!
Copyright © zogu 2021 - 2025. All Right Reserved.